기존 깃허브에 올려져있는 코드머신으로 이미지를 조합해 대량의 NFT를 제작하는 방법!!
*metadata 까지 포함해야 실제로 사용도 가능하기 때문에 다른 코드들을 활용할때 잘 확인해주어야 합니다.
방법1 . node.js 사용
https://github.com/HashLips/hashlips_art_engine
GitHub - HashLips/hashlips_art_engine: HashLips Art Engine is a tool used to create multiple different instances of artworks bas
HashLips Art Engine is a tool used to create multiple different instances of artworks based on provided layers. - GitHub - HashLips/hashlips_art_engine: HashLips Art Engine is a tool used to create...
github.com
위의 깃허브에서 clone받아서 사용해주세요.
- 터미널에서 git clone 레포지토리주소 를 통해 vscode로 실행합니다.
- clone받은 폴더 내 디렉토리(위치)에서 터미널에 npm install
... 시작부터 에러가 잔뜩 떴다. npm설치시 나온 gyp info 관련된 error 구글링해보쟈

일반적으로 아래 두가지 부분에서 문제가 있어서 발생할 수 있다고 합니다.
1. python 버전을 2.7.x로 맞추기
Error with npm install - a pre-gyp error
Error with npm install - a pre-gyp error
I wanted to install this angular 2 calendar using npm. Tried to use npm to install it and then downloaded it and tried to install it. In both cases its failed. I am on windows and I previously got...
stackoverflow.com
I had to install python first python.org, you need to use version 2.7 as node-gyp doesn't support the later versions.
So install python 2.7, then npm install -g node-gyp. That worked for me and got rid of all the other errors install angular-cli as well.
보니까 python 2.7 버전을 사용해야 가능한것 같다!
일반적으로 python 3.xx대를 사용하기 때문에 다시 2.7버전을 설치해주기
2. node 버전 downgrading
너무 최신버전이라도 잘 안되는것 같다. 전 16버전대에서 에러가 났어요ㅠ
$ sudo npm cache clean -f
$ sudo npm install -g n
$ sudo n 14.17.3   //해당 버전에서 정상작동(버전이 다르면 후에 에러발생 할 수 있음)
그리고 다시 npm install을 해주니까 저는 성공했습니다! node_module 폴더가 생성되면 성공!

다음으로 src > config.js 에서 본인의 nft에 맞게 코드를 조금 수정해봅시다.

네트워크 연결부분에서 이더리움에 연결(본인이 사용하는 것으로 작성)
const network = NETWORK.eth; //이더리움:eth ,솔라나 사용시 sol
메타데이터에 입력될 타이틀과 설명 부분을 본인의 nft에 맞게 작성해주세요.
// General metadata for Ethereum
const namePrefix = "타이틀 입력";
const description = "설명글 입력";
address 부분에 본인의 지갑주소를 넣어줍니다.
creators: [
    {
      address: "____본인 지갑주소 복붙____",  //메타마스크 지갑주소
      share: 100,
    },
layer 폴더와 관련된 코드!
layer 폴더 안에 각 nft조합 요소들 이미지가 들어갈 폴더 이름을 아래 코드의 name에 해당하는 이름과 똑같은 폴더이름으로 만들어 주세요.
const layerConfigurations = [
  {
    growEditionSizeTo: 15,   //nft 조합 개수
    layersOrder: [
	 //아래 name들은 각 폴더명이랑 같아야함
      { name: "Background" },
      { name: "Cloud" },
      { name: "Eyes" },
      { name: "Mouth" },
      { name: "Cloth" },
      { name: "Items" },
    ],
  },
];
그리고 각 요소별 폴더안에 해당하는 이미지들을 넣어줍니다.

이때, 요소별 폴더(예:Background)내의 이미지들의 이름을 정할때
이미지 이름뒤에 #희소성가중치 를 붙여주어야 합니다.
예로, 가장 큰 희소성 가치를 주고 싶다면, 이미지이름#100.png 라고 하면됩니다.
(1~100까지 숫자로 가치 부여)
다음은 완성될 nft의 이미지 비율설정 코드입니다.
width와 height에 이미지 제작시에 정한 전체 이미지 비율에 맞게 px 값을 넣어주세요.
(제작한 이미지와 비율이 맞지 않으면 완성된 nft가 깨져보일 수 있어요!)
const format = {
  //이미지 비율
  width: 1080,
  height: 1080,
  smoothing: false,
};
...
나머지 부분도 더 필요하다면 코드를 직접 커스텀해서 사용하시면 됩니다!
코드 커스텀 완료 하였다면,
$ node index.js
만약 layerObj.options?.["displayName"] != undefined error가 뜬다면?

버전이 잘 맞지않아서 발생할 수 있음 → v14.17.3으로 변경해보기
기존 node module을 지우고 변경후에 다시 npm install 하고 node index.js 실행
생성 갯수만큼 생기는걸 볼 수 있고, build 폴더 안에서 이미지와 metadata(json폴더 내)를 확인 가능합니다.

생성된 nft 이미지들을 한번에 합쳐보고싶다면?
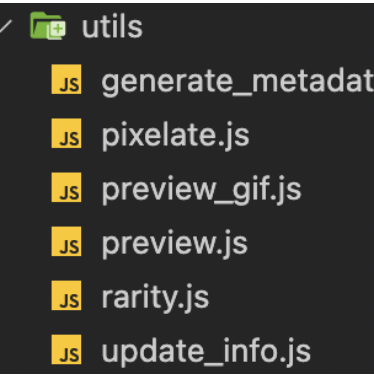
$ node utils/preview.js
build 폴더 내에 preview.png가 생성된 것을 확인할 수 있다.

embedded links
Create 10000 generative NFTs : Artworks with code part 6
How to Generate 10,000+ NFTs (with Metadata for Solana OR Ethereum)
혹시 Python으로 해보고 싶으신 분들은 참고!
방법2 . python 이용
Create Your Own NFT Collection With Python
Generate Your NFT Metadata
https://github.com/benyaminahmed/nft-image-generator
'Start-Up > NFT Project -7777' 카테고리의 다른 글
| [NFT P-7777] 컨셉 및 시안제작 (0) | 2022.03.21 |
|---|---|
| [ intro] NFT 프로젝트-7777 (2) | 2022.03.04 |

댓글